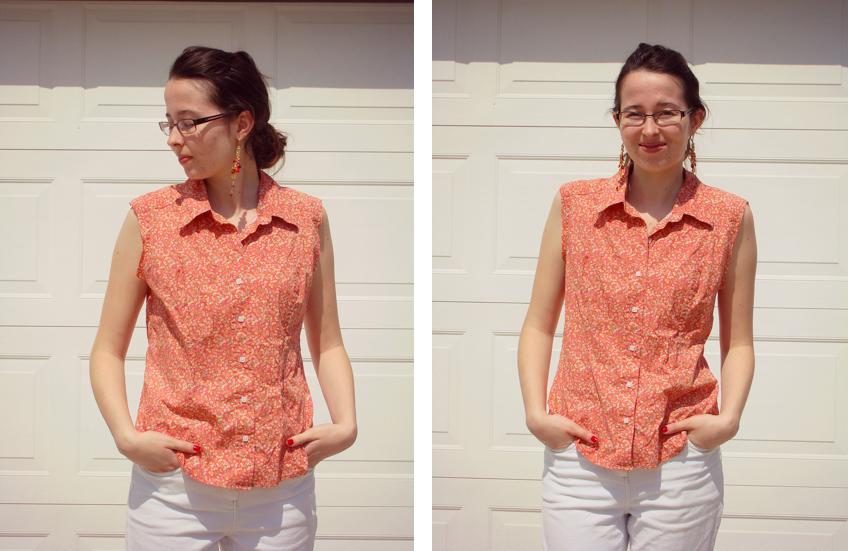
Hello everyone! It has been awhile since I've done a sewing project, or at least finished one. I did start making a 1950s skirt in January of this year, but I haven't finished it yet as I'm showing my sister, Hanne-col how to make skirts with no ready-made sewing patterns, but with just basic math skills.
Let's see here, the story behind the design of this dress has been a long one in the making. I came up with the basic idea of these two fabrics paired together for a sundress last summer, but the design was never really clear in my mind so I pushed the idea to the back of my head. Fast forward to last week, I was working my shift at work when the design for this dress popped into my head -- in-between helping out guests I sketched out the design onto the back of a receipt.
Showing posts with label sewing. Show all posts
Saturday, August 29, 2015
Wednesday, December 31, 2014
New Years Eve Sewing Day
It isn't often anymore that I have sewing days, mostly because I typically work one day, day off, work two days, etc.., that I typically spend all of my off-days working on blog stuff or hanging out with family & friends. Which is why when I had two days off in a row this week, I decided to take that time to have a sewing day with my sister, Hanne-col. Of course, after we had gotten started our sister, Abby, and friend, Liz [who is over to spend NYE with us] decided to join in the fun too with their own crafts. #craftsarecatchy
Friday, October 25, 2013
#AvonleaFW ❘❘ A Study of My Favorite AOGG Costumes
When I first watched Anne of Green Gables (1985) back in 1999, when I was nine years old, I instantly fell head-over-heels in love with the costumes. It was the Anne movies that made me want to learn to sew an AOGG dress -- someday. We (my sisters and I) would watch the movies over, and over again. We would rent the movies so often from the library, that the librarians would ask us if we wanted to rent the Anne movies when they would come back in, before putting them back on the shelves. Can you guess what our answer would be? Of course, we would always say, "Yes!"
But now, I have a confession to make. With Anne giving me the love of period costumes, I have never recreated any outfits from the movies. I have copied dresses from: "North & South" (2004), "Sense & Sensibility" (1995), "The Young Victoria" (2009), and "Pride & Prejudice" (1995). But never from my beloved AOGG -- mostly because I think I want them to be perfect. You know, I have been planning the costumes since I was nine, and now I am twenty-three.
I thought, why not share some of my notes and research on two of my favorite costumes! I'm sure someone will find it useful, and so will I when ever I find the perfect fabric for my projects.
First off, my all-time favorite costume of Anne's! The cow chasing dress.
The dress is made of a blue and white vertically striped material. The collar is a rounded sailor style with white braid trim along the edge and a navy blue tie (which appears to be of a sheer material). The back of the collar has the stripes forming a "v." The neckline is filled with a horizontal striped sheer tucker that shows evidence of having a piece of boning on either side of the neck. The bodice is plain, gathered at the center front, and buttons down the back. It is separated from the skirt by a waistband. The sleeves are ¾ length with fullness at the cap and cuff. The cuff is 1.5" wide and of white dotted material. The skirt is five gores (three in front and two in back) with the center front gore having the stripes cut horizontally, while remaining gores are all cut with the stripes running vertically. There is some fullness at the center back. A 6" ruffle at the hem completes the dress. (Taken from In Timely Fashion which is now down.)
Patterns I though would be perfect for recreating this dress, with minor changes of course.
B4826 (View A) You would have to switch the opening to the front. Change the shape of the collar in the back. Change the fullness of the sleeve, length of sleeve, and cuff.
B4698 (View D) Take away the ruffle. And smooth out the shape of the collar around the neck. Of course, you would have to adjust the collar so if fits underneath the blouse.
Sense & Sensibility Patterns: 1909 "Beatrix" Skirt pattern - Just adjust the length. Add ruffle to the bottom of skirt. And have the skirt slightly gather around the waist.
With all of my research, and seeing a gown from around the same era in London in the autumn of 2009 (sadly I can not share pictures for copyright reasons). I strongly believe that, the lace collar has either hooks & eyes or snaps, along the back of the neck and all around to the front and back. Making the collar removable. Also, I believe that back of the dress buttons up until her sailor middy collar, meaning you would have to slip the dress over your head. But the buttons in the back (plus the collar is removable) would give you plenty of room for you to slip right through.
Next up, her Vest Outfit (seen in the beginning of the movie).
This is a three-piece outfit consisting of a shirtwaist, vest, and skirt. The blouse is white with light grey dots. It has a stand-up collar, which forms a "v" at the upper edge and opens down the center front. A bar pin securing the collar and a taupe ribbon forming a bow give the collar a more special air. The sleeves are gathered at the cap and cuff, with the cuff being around 2.5" wide. It is hard to see how the bodice is treated, but it most likely has some fullness. The shirtwaist closes down the front with buttons.The vest is of a grey and taupe plaid and is fitted with darts. It is pointed at the front waist and straight across the back. The vest is secured down the front with six taupe buttons. The skirt is made of a plain brown cloth (likely a medium weight wool or heavy cotton). It is six gores with fullness at the center back and has three large tucks at the hem. It is hemmed at a comfortable walking (or cycling, for that matter!) length.Let me talk for a moment about this outfit and its wearability for a modern girl. This style of ensemble (shirtwaist, vest, and skirt) was popular at the turn of the last century for the very reason that it was easy to care for (because it was three pieces, one didn't need to launder the whole thing at once), very versatile in that you could change pieces of the outfit to create a new look, and practical. I would not think it amiss to wear something akin to this outfit today. Practical, sturdy fabrics make for a lovely, feminine design that stands up to repeated wear and tear and is tough enough to withstand the dirt and grime we encounter day-to-day. (In Timely Fashion)
- Use Sense & Sensibility Patterns: 1909 "Beatrix" Skirt pattern for the skirt. You would just have to add tucks.
- For the blouse, I would recommend using Sense & Sensibility Patterns: 1909 "Beatrix" Shirtwaist pattern for the base of your blouse. As it has many options to choose from in the pattern.
- To make the vest I would recommend using a basic bodice pattern and adjust accordingly to make your vest.
I hope some of you will find this helpful.
~Ashley
Thursday, September 5, 2013
Refashioning Project | Vintage 1970s Hawaiian Dress
What I'm Wearing
1970s Hawaiian Vintage Sundress -- Won in a giveaway
Jean Jacket -- Express via Thrift Store ($8)
Mint Sandals -- Forever 21 ($7)
Belt -- Hand-me-down (Free)
Earrings -- Charming Charlie's ($3)
Nail Polish -- OPI in Got the Blues for Red
Hello everyone! I won this vintage '70s Hawaiian sundress in a giveaway last summer, but the color was a little brighter then I'm used to. Also, the neckline of this dress was a little high, so I did the unthinkable (for me at least) I refashioned the neckline. Guys, I cut into a vintage dress! I dislike cutting up, taking apart anything vintage (70s or earlier), so this was hard for me to do. Anyhow, even after refashioning the neckline (so it didn't choke me anymore), I still found the dress a bit bright. Fast forward to this summer and I realized, hey I can tone down the dress with my jean jacket -- now I don't feel like it is so very bright. *smile*
~Ashley
~Ashley
Sunday, July 14, 2013
1960s Inspired Birthday Dress ❘❘ Sunday Style
Today at church I wore my 1960s inspired birthday dress that I had made earlier this month for my 23rd birthday. I love the color & details the dress has [like the collar & nice big buttons]. Also, I bet you would think that the dress would gap between the three big buttons, but with the way the bodice is made it doesn't. Color me shocked, as I was certain that it would gap badly considering the way modern dresses/blouses gap with smaller buttons and closer placement. Anyhow, onto the pictures and details about the dress & how it was made.
What I'm Wearing
1960s Floral Dress -- Made by Me
Brown Belt -- Forever 21
Tan Heels -- Target
Lipstick -- Revlon's Pink in the Afternoon
Hello everyone! Remember back in February on Pinterest & Instagram that I was going to make a 60s dress for a Mad Men sewing challenge. Nope? That's alright. Anyhow, sadly I never had the time to do that sewing challenge, so the dress never got made....that is until I decided the dress would be perfect for my annual birthday outfit (a tradition that I started back in 2007). Of course, I waited until two days before we had to leave for PA to make the dress. Normally this wouldn't be a problem, but this pattern had more details than I realized so it took me way longer than normal to sew the dress. I spent all of late Sunday afternoon and part of early Monday morning sewing this dress to get it finished in time, mostly because we were leaving early Tuesday morning for PA. Remind me to never delay a sewing project for the last minute. To say the least, I was thankful when it was finally finished.
Pattern Review
Pattern: Vintage Simplicity 3829 (view 1)Pattern Description: Full gathered skirt, interesting sleeves, collar
Pattern Sizing: Size 14 (Bust 34)
Fabric Used: A 100% cotton print from Abraham's Lady in Gettysburg, PA. This fabric was a birthday gift back in 2009 with the original intent for a 1860s dress. For practical reasons, I used it instead for a dress that came a hundred years later, you know the 1960s. *grin*
Cost of Project: Fabric (birthday gift), vintage bias tape (.75), thread (been in my stash for 4 years), vintage buttons ($1), hook & eyes (been in stash for 6 years), and vintage snap (.25). Total cost: $2
Were the instructions easy to follow? Yes, the instructions were easy to follow -- but I find this common with all vintage patterns. Now days, pattern instructions are just like greek to me.
What did you particularly like or dislike about the pattern? I love the attention to detail this pattern gives with the construction of the dress. Normally, I don't care too much, since I only love the finished product & the planning of a sewing project. But with this dress, I followed all of the vintage finishing techniques that the dress looks just like my vintage dresses from the inside.
Pattern Alterations or any design changes you made? Nope, I followed everything to a tee. Which is very rare for me, since I normally don't follow anything to a tee.
Would you sew it again? Yes, I think this dress would look adorable in gingham or in a lightweight wool.
Would you recommend it to others? If you can located yourself a copy of the pattern, yes! But, this dress is not for the beginning sewer.
~Ashley
Tuesday, July 9, 2013
Random Updates
- We are back home (as of Sunday evening) from PA and we had a blast at Vision Forum's HOA!
- I enter their costume contest with my 1940s swing dress, but alas I didn't make it to the next round. (that was nerve-racking, walking up onto the stage in front of all those people).
- We were able to meet up with some friends at the event that we haven't seen in awhile, which is always fun.
- Me & Gaby both want some 1940s swing dresses made out of cotton fabric sometime this summer now.
- I've mastered a 1940s inspired up-do. Yay! I'll try to do a video tutorial of it sometime, as I really want to do more tutorials like that on my channel.
- One of the downsides of the trip is, we got bed bugs at our hotel. So until we get the bed bugs under control at our house, posts & videos will be scarce for a bit. But I'm sure y'all understand. :)
- I want to thank everyone who tweeted, emailed, posted on G+ a happy birthday to me this past Friday! It was such fun to read them all. For those who don't know, I turned 23 on July 5th. Since we were gone on my birthday, we will be having my birthday dinner this weekend (either on Saturday or Sunday).
- Would any of you girls be interested in taking online sewing lessons from me? I would be charging for this class. If so, what would you like to learn in this class? How much would you be willing to pay for classes? Would you like live person-to-person video classes? Or would you like videos you could accesses at anytime (once you've paid)?
~Ashley
Monday, June 17, 2013
The Great British Sewing Bee | BBC TV Show
I don't know about you, but I love the shows that the BBC comes out with: Call the Midwife, Sherlock, Doctor Who, The Great British Bake Off, etc.... Recently I discovered the show, The Great British Sewing Bee on YouTube and it is the perfect sewing show. It features the history of home sewing and fashion in Britain's history -- fascinating stuff! But not only that, it also shows sewing techniques & projects and how you can do them yourself, which is handy for home sewists who would like some sewing tips while watching a television show. Oh, yes, another thing I love about The Great British Sewing Bee is the music! Gotta love listening Doris Day while watching a sewing show -- perfect for the vintage girl at heart.
If you would like to watch the show yourself, search The Great British Sewing Bee episode 1 on YouTube to find the first episode. I won't embed the episodes below, because you never know how long they will stay up. Btw, there are only four episodes.
Have fun watching! (Btw, if you follow my other blog, A Girls Home Life, this is a repeat post.)
Sunday, June 16, 2013
Sunday Style | The Floral Pencil Skirt
I don't know about you, but I love a good floral pencil skirt. Only problem, I didn't own, well, until I refashioned an old floral skirt that I had lying around. I've had this linen floral maxi skirt that was shaped like a pencil skirt lying around for awhile now. One problem, the length was totally unflattering on me (it was Petites, which could have been part of the problem), so yeah, I never wore it even if I did love the print. When I was considering posting it for sale on my blog, I thought why not refashion it into a pencil skirt?!? So I did, last night at 10 o'clock. Yeah, I kinda like to do my refashioning projects late on Saturday nights. Not sure why? But, hey! Who's complaining? Not me.
Now since this was a last minute late night job, I don't have any before pictures of the skirt. This seems to be a common problem with me. I always rush head on when ever I refashion something, and never take any before pictures, only after. Hmm....I need to reform my ways. Anyhow, since I wanted to wear the skirt to church the next day, I needed some inspiration on how to style the skirt. Enter the wonderful world of Pinterest. I found the following adorable & stylish ways to wear a floral pencil skirt for spring and summer.
Cute, huh? The most common top pairings seem to be the following: gingham, chambray, stripes, or a solid color (either neutral or bright). I decided to take the chambray top as my inspiration, and just add more color with my accessories (jewelry & handbag), since my skirt is more on the muted side -- color wise.
What I'm Wearing
Floral Pencil Skirt -- Refashioned by Me
Chambray Tunic -- JCP
Wedges -- Payless Shoes
Belt -- Target
Statement Necklace -- c/o Max & Chloe
Coral Earrings -- Target
How would you style this floral pencil skirt? Let me know in the comments below!
Wednesday, May 29, 2013
Vintage Sewing Project ❘❘ 1950s Gingham Sundress
Summertime is just about here (and sometimes the weather feels like it too), which means that I want to wear vintage styled sundresses. I've been planning on making a red gingham sundress for awhile now, but I never took the time to make it. Mostly because I've been busy with other things, and when I did have time to sew I had sewing jobs to do. Which is good. Anyhow, we will be leaving on vacation this weekend and I wanted a cute, vintage-inspired sundress to wear on the trip. It seems that I get most sewing jobs done quicker when I want to wear it on a upcoming trip. Hmm....I need to change that. Of course, I say that every time and I never change my ways. *grin*
The above collage is of the sundresses (vintage & modern) that I found inspiring when coming up with my sundress design. The bottom middle dress turned out to be main inspiration for the dress, which if I remember correctly, is a vintage dress from the 1950s.
Anyhow, the pattern for my dress was loosely based on the Summer Shade jumper pattern that Marie-Madeline Studio used to sell. I used the jumper bodice pattern pieces as my base, just made some changes for it to fit like a strapless dress, like: making the sides more fitted, raising the neckline, and reshaping the jumper back. The skirt and straps are just rectangles pleated to fit. Oh, and instead of using a facing for the bodice, I just lined the whole bodice front & back with leftover gingham fabric.
Supplies Used
The Summer Shade Jumper Pattern was the base for the bodice.
Straps are just two rectangles pleated lightly to fit.
Skirt is just three panels that are 28" long.
Eyelet Lace Trim from L.A.
Invisible Zipper
Thread
Invisible Zipper
Thread
I love my new sundress! It kinda looks like something you might find at ModCloth. Which is a good thing. You knows, I might make another sundress just like this one sometime again this summer. 'Cause it is just too cute!
Wednesday, May 15, 2013
Tips & Tricks on Refashioning Vintage Blouses from the Thrift Store
It seems that when ever I wear one of my refashioned blouses that I had cut the sleeves off, I always get questions on how I did it. So I thought why not make a whole post/video dedicated to the subject, that way when ever I get asked the question again I can just direct them this.
Now, I did do a whole step-by-step tutorial complete with pictures on Practically Pink last summer. So if you are the type of person who prefers pictures over video, that will be perfect for you! Of course, you can look at that post for reference after watching the video too. *smile*
I suppose that I should mention that, you don't have to use just long sleeved blouses for this tutorial. You can use short sleeves, 3/4 sleeves, half sleeves, etc... What ever you have handy, or can find at your local thrift store will work. If you still have any questions, let me know in the comments below!
Monday, April 1, 2013
DIY 1940s Inspired Gathered Skirt Sewing Tutorial
Hello everyone! I'm going to be showing you how to make your very own gathered skirt using no patterns. Instead, you will be using your personal measurements to create the skirt. I'll be sharing what supplies you will need, along with the math for creating the skirt yourself. Don't worry, it isn't too much math and isn't hard at all. Trust me. :)
::Supplies You Will Need::
-- About 2 yards of fabric. (You can find out how much you will need by doubling the length of your skirt, then adding what ever you will need for the waistband. Just make sure to leave some wiggle room for shrinkage and any miscalculations you might have done.)
-- 9" invisible Zipper that blends in with your fabric
-- Thread
-- Cording, Yarn, etc... for gathering your fabric.
-- Scissors
-- Measuring Tape
-- Sewing Pins
-- Sewing Machine
-- Zipper Foot
::Math for Creating the Skirt::
Figure out how long you want the skirt to be, by holding the top (1" side) of the measuring tape at your natural waistline. Remember to add about an inch for the waist and 2 inches for the hem.
Example: Waist to hem (27") + Waistband (1") + Hem (2") = 30"
For your waist band: measure your waist and add about 1 inch, divide that number by 2 and you will get the length measurement. The width of the waistband is up to you, just make sure to add about 2 inches for folding on either side.
If you have any questions, feel free to ask me in the comments, or shoot me an email at: bramblewoodf (at) gmail (dot) com
Do you like this type of tutorial? If you do, would you like to see more videos? Also, would you be interested in a sewing video series on where I share my tips, resources, patterns, etc...for beginner sewers?
Before I forget, remember that coupon code I shared with y'all around Christmas time for Better Dresses Vintage? Well, that coupon code is back, 10% off any order from Better Dresses Vintage using the code: Bramble10 at checkout.
Thursday, March 28, 2013
Sew For Victory! A 40s Sewing Challenge -- Finished Skirt
Well, remember back on March 16th when I talked about joining the Sew for Victory! 1940s Sewing Challenge? Well, yesterday I finally decided which photo I was going to copy, and which piece of fabric from my stash that I was going to use. If you follow me on Instagram, you may already have an idea of which picture I ended up picking for my inspiration.
Are you curious to know which photo I ended up picking? Well, without further ado, let me share with y'all the finished project. Oh, wait! I have one more thing to share with y'all, at either the end of this week, or sometime next week there will be a video tutorial showing how to make this project yourself. Alright, now the big reveal with no more rabbit trails, I promise. *smile*
Yes, I went with the basic gathered skirt for the challenge. True, it isn't that hard to make, but it was something I've been wanting in my wardrobe for awhile now. This skirt is one of those basics that you will always turn to when you don't have a clue on what to wear. Another great thing about this skirt, is that it can be styled vintage, vintage inspired, modern, or purely country with a jean jacket & cowgirl boots. Yes, I'm going to have lots of fun styling this skirt in the coming days!
Are you curious to know which photo I ended up picking? Well, without further ado, let me share with y'all the finished project. Oh, wait! I have one more thing to share with y'all, at either the end of this week, or sometime next week there will be a video tutorial showing how to make this project yourself. Alright, now the big reveal with no more rabbit trails, I promise. *smile*
Yes, I went with the basic gathered skirt for the challenge. True, it isn't that hard to make, but it was something I've been wanting in my wardrobe for awhile now. This skirt is one of those basics that you will always turn to when you don't have a clue on what to wear. Another great thing about this skirt, is that it can be styled vintage, vintage inspired, modern, or purely country with a jean jacket & cowgirl boots. Yes, I'm going to have lots of fun styling this skirt in the coming days!
- Pattern -- No, pattern. Just measured out lengths of fabric to create the skirt. Tutorial coming soon!
- Pattern Description -- Simple gathered skirt.
- Pattern Sizing -- What ever you want!
- What inspired you to make this? -- This 1940s photo & the Sew for Victory! sewing challenge.
- Fabric Used -- Apple Green Gingham Fabric (it is 100% cotton) from my stash (bought on fabric.com last year).
- Supplies Used -- 9" Zipper, thread, sewing machine, cording, zipper foot, tape measure, scissors, and fabric, of course.
- Would you sew it again? -- Yes, it is a simple skirt that would look amazing made up in a bunch of fun fabrics!
- Sewing Level -- Easy/Beginners.
::What I'm Wearing::
Lace Top -- Nine & Co. via Thrift Store
Gingham Skirt -- Made by Me
Skinny Leopard Belt -- Forever 21
Heels -- Naturalizers
Pearl Earrings -- Claire's
Red Lipstick -- NYC in Sheer Red
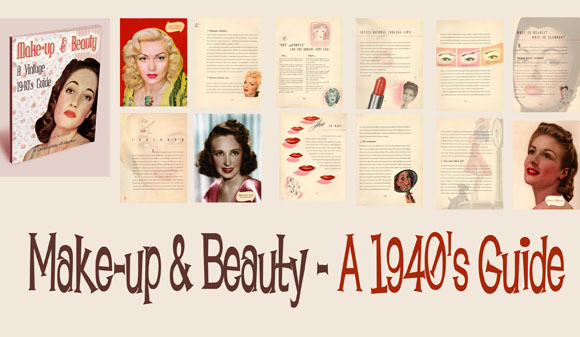
Btw, if you are interested in learning more about 1940s makeup and beauty, you should check out this e-book. I recently download all of their makeup & beauty guides (it is a better deal that way), and they are chock full of helpful information! Definitely a great buy if you are into vintage hair & makeup, or just wanting to learn more about vintage beauty trends.
Subscribe to:
Posts (Atom)